How to Upload Subtitles to Facebook
March 1, 2019


Why Use Subtitles
This day and age, most videos are watched without sound, especially on social media. In fact, 85% of videos on Facebook are watched without sound! But there’s an easy solution- closed captions! But how do we upload subtitles to Facebook? Find out below!

1. Upload Your VIdeo to Facebook
The first step is to upload the video natively to Facebook to ensure optimal reach and engagement. While in the past, you may have shared a YouTube link to Facebook, this actually diminishes the potential of the post. Facebook wants to keep users inside of Facebook, not send them to YouTube. If you’re not sure how to do this, check out this how-to video.
2. Correct Subtitle File Name
Once your video is uploaded, give the video a title. We suggest titling your video with the name of your company and the type of video. For example, our brand video would be titled: Consume Media Brand Video
This next step is very important. Open your files, find your subtitle file, and rename it to fit Facebook’s guidelines.
The file naming convention is:
[title of video].[language code]_[country code].srt
So what does this mean?
- [title of video]: This is what you titled your video on Facebook. In our example, it is Consume Media Brand Video
- [language code]: This is a code that tells Facebook what language your subtitles are in. If your subtitles are in English, this code would be en
- [country code]: This tells Facebook what country you’re posting from. For the United States, the country code is US
- We generally post English subtitles from the United States, so our subtitle files look [title of video].en_US.srt
For our example, we would rename our subtitle file to Consume Media Brand Video.en_US.srt
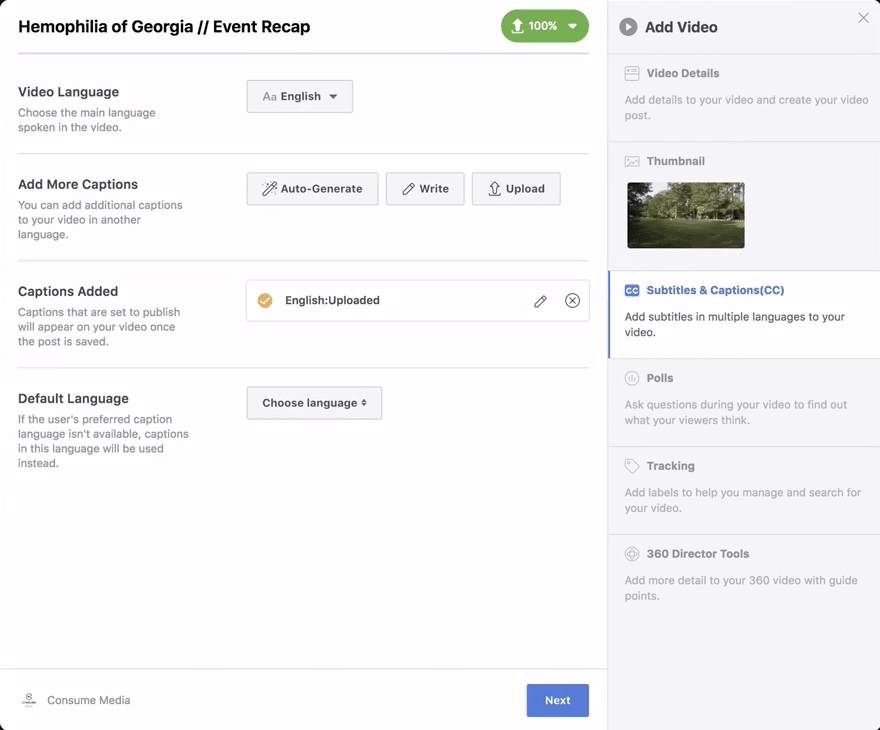
3. Time to Upload the Subtitles
Once the video has finished uploading, click Subtitles & Captions (CC) located on the right side of the video window. Next to Video Language, click the drop-down arrow to select a language. Next to Add New Captions, click Upload. Find the .srt file that you named in step 2, and click Open in the bottom right corner.
4. Ready to Publish
Now that the subtitles have uploaded, you’re ready to publish! Click Next, then Publish and you’ll be live!
If you want to schedule your video to post later, click the bubble next to Schedule, then pick your ideal date and time.
Subtitles are Important!!!
Subtitles will increase your video’s reach, engagement, and view time, so it’s extremely beneficial to take the time to upload subtitles to Facebook. Ensure your message gets across with or without sound!
Interested yet?
Let’s Chat.
